Wednesday, July 21, 2010

No go on the Frig.

Didn't get a chance to really look at the refrigerator when I got it. The next day I put it together and plugged it in. Well it didn't work and here is why.


The heat exchanger on the back is rusted out. Happily the RV salvage yard is really good at taking something back if its no good.
__
No pics but I have finished putting in the last rivets, put silicone in the inside to seal up where the windows use to be. I also started doing a good clean up on the inside to prep to build out the interior. My next step will be to buy closed cell sheet insulation, and some 2x4's and 2x2's. 

Monday, July 19, 2010

Went to the RV salvage yard today and got some goodies.

Got a Kenmore refrigerator. Its a 110v not a three way. I really don't want to have to wire and plumb gas to a three way, so I hope this works.
The insides look really clean. There is a little rust on the top and front door. I'll sand it off and paint over it with some appliance paint. May repaint the entire thing, wife wants it black. We'll see.

It's about 5 feet tall. Have not plugged it in yet. I hauled it with it laying down in the bed of my truck so I want to give it some time before I see if its any good.
Black and gray water tanks. black tank is 30 gallons gray is 40 gallons. I did not think I was going to use an used black water tank. I did not want to mess with someones poo. But when i saw these I had to have them. 

I have to figure out how I well be mounting them in the under belly storage. In my original plan I was going to hang the black water tank just under the floor in the underbelly storage, and the gray water in between the frame rails. I wanted to run the gray water through the black water tank to clean it out a little. I'll have to see if that will still work.

Another shot of the tanks. I will be going back an getting a fresh water tank soon. I need to if I'm going to start working on building out the inside, because I well be putting the fresh water under the sub floor of the master bed room.

Here is the couch. It sits on top of a box. I had planed to put a couch behind the driver's seat. To do that I was going to build a box over the driver's side wheel well. This couch is what I wanted but a little shorter. I don't thank I could sleep on it.

It had been out in the weather. I'm going to take off the cover and see how the cushions look tomorrow.

And finally the inverter.

I got this stuff on trade for my other bus. I've got 500.00 more to go.


Wednesday, July 14, 2010

More Done.

Hay all, Got a lot done this week. I am for the most part done with hanging the panels on the exterior of the bus, just a few odds and ends to finishing up until I start building out the inside.

OK here is the drives side with the emergency exit door. Got it done Tuesday with the help of my Brother. The very first panel I hung on the other side was a pain in the butt. If I had known what I had learned from putting up the last three, when I did the first one it would have been so much easier. 

I put construction adhesive on the bus then clamped the panels in place as well as use long 2x4's pushing up from the bottom edges in two places. I then drilled one place on each end to secure it to the bus, then drilled out, starting in the center of the panel and working out, and attached it with rivets. Boy did my had hurt.

 
Drivers side front edge. I took the covers off between the windows on the other side, but not on the driver side. If I were to do it again, I would leave the covers on like I did on the drivers side. You will see why when you see the front passenger side edge.
Back edge of the front panel on the driver side. Looks nice. I measured top to bottom at 31 inches. If I ever do this again I'll go 30 1/2 inches to better clear the lower row of screws.
Front edge of driver side second or rear panel just after the emergency exit door. Have a little clean up to do on the construction adhesive.

Rear edge of the second panel on the driver side. I took the two emergency exit windows that were taken out and put them across from each other in the master bed room area. My thought is to be able to have them open on nice cool nights and get a good cross breeze.
Rear edge passenger side. I did not like the way this was left. I will be putting a lot of silicone caulk in there. This is why I said earlier I would leave the panels between the windows on.
This is the seem when the front passenger side panel goes over the rear passenger side panel. I like the way it fit. They overlap by about 4 inches and have two rows of rivets to hold them together.
Front passenger side panel edge. I had one of the window panels cut to cover the front edge to help keep water and wind from entering under the panel. How ever I still like the look of the front panel on the other side.
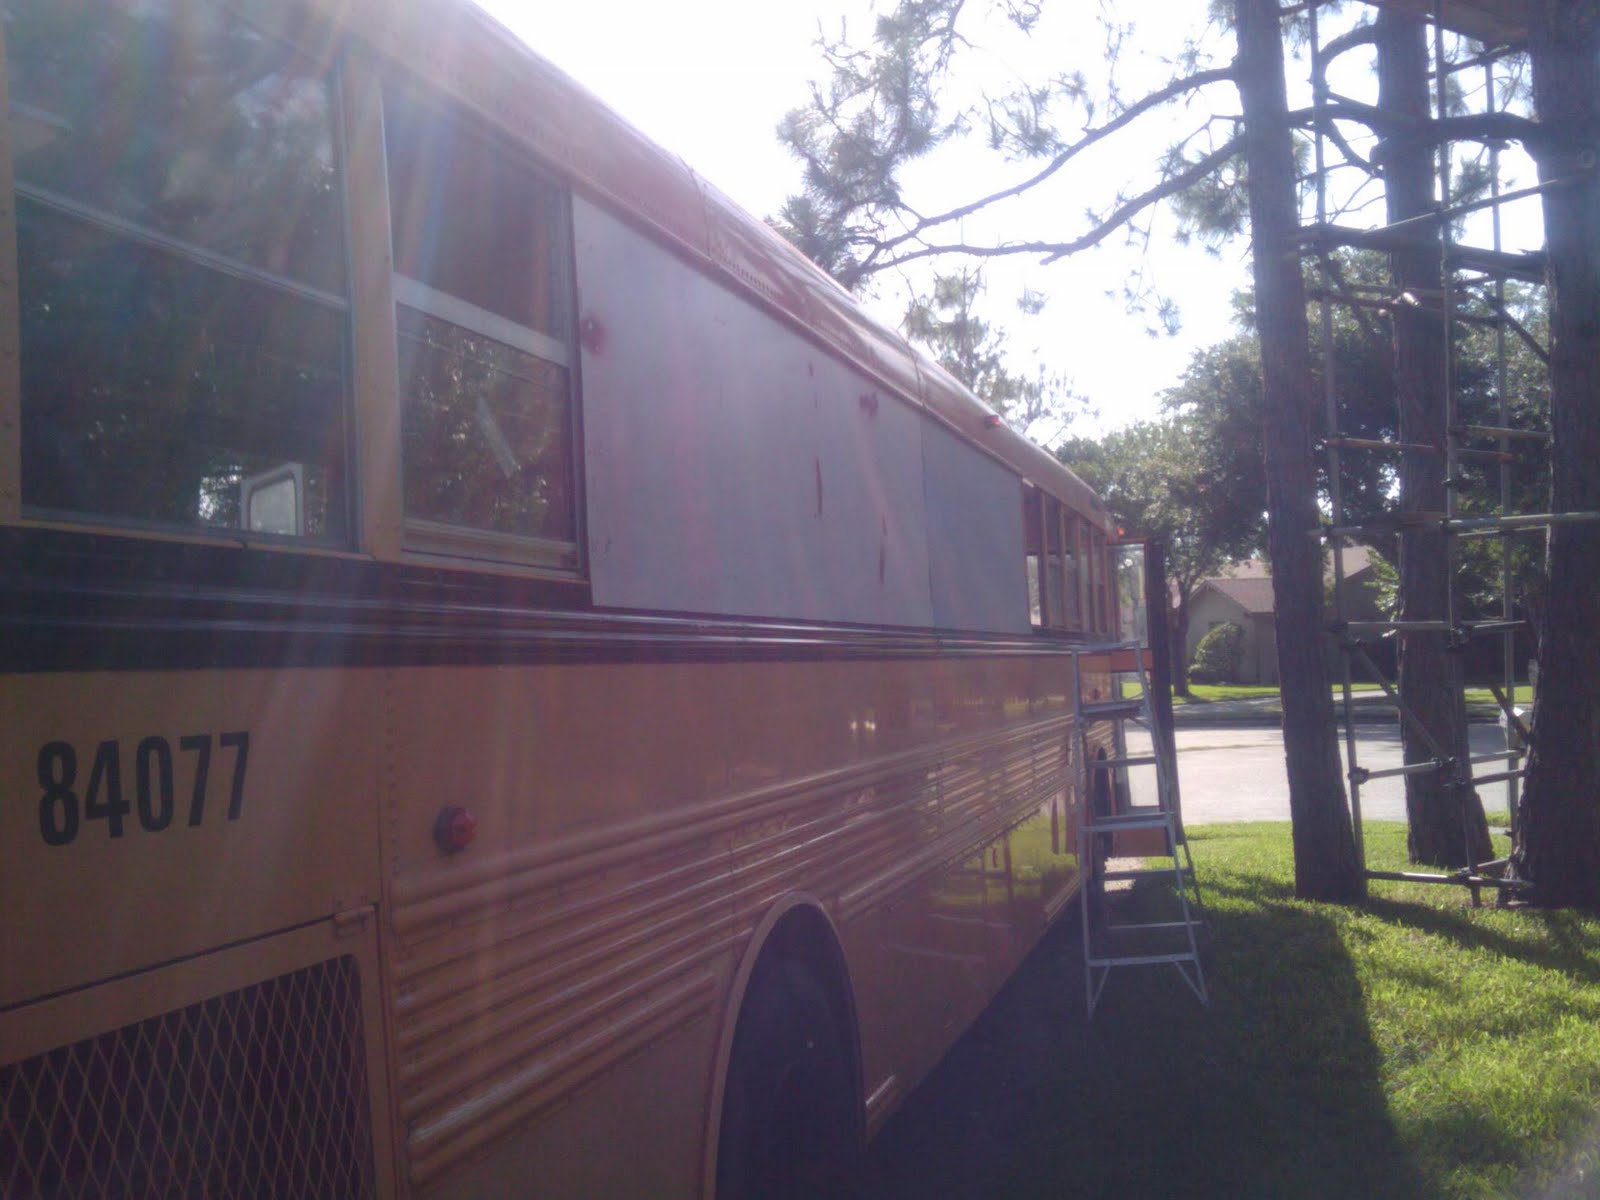
Bad pic because of the sun and phone camera, but this is a long pic of the passenger side.


A look at the inside. 

My helper. Thanks Ronnie for helping out.

My next step is to secure the inside tops. I am using the aluminum tray rack that you see in the interior pic to make some angle brackets to attached to the top window frame and sheet metal. After that I will be sealing up the edges with silicone and then putting in sheet insulation where the windows use to be. Then I'll start working on framing up the insides.
Until next time...

Friday, July 9, 2010

one side done... almost.

Just a few pics of the right side of the bus with the panels on. I'm having a friend cut one of the window frame covers, that went between the windows so I can place it on the front edge to help keep water out from under the metal.


The first one was a lot harder to do because of the learning curve and weight. The second one was a lot easier.

Still need to find out why my paint is coming off.

Wednesday, July 7, 2010

More Work Done

Howdy All.

I have not had the chance to post in a while. Been waiting on time and money to work on the bus so here is the latest.
Got the sheet metal. Its galvanized 14 gauge. Its that thick because it was some metal the guy could give me the best price on. But man is it heavy.

 
I got four sections. One to cover four windows then a second to cover three for a total of 7 windows on the passenger side. Then two sections that cover three windows each on the drivers side. Before and after the driver side emergency exit.
Getting ready to primer the metal. I primed them inside the bus, I figured it would keep them out of the rain and I thought it would help them cure with the heat. I primed it with rustolum gray primer for galvanized metal.

Primed and drying.


This is about a week later. I wet sanded the primer to smooth it out a little, let it dry then painted this one section with rustolum gloss white.

Painted and ready to go. I thought.

Not shown because no one was there to take the pics, is me getting this up on the side of the bus. I got my brother who is 63 years old and just recently out of the hospital to help. He got inside and put the clamps on while I was outside lifting the 14 gauge metal up on the side of the bus. Man what a pain that was, but it got done. It took two Jack and Cokes, one OJ and Vodka and two extra strength Tylenol, to dull the pain, and I'm still feeling it. Man it sucks getting old.    

I did use the original screws to secure the metal on the side of the bus, thought I would save some money, but when doing it realized I would not have enough good screws to do all the metal, so I broke down and got pop rivets.

 
Ready for the metal


I used construction adhesive where the metal touched the frame, and along the bottom. I was not happy with how the paint turned out as it was pealing off with any contact. I will have to figure out why the paint did not stick, hopefully the guys at skoolies.com will be able to answer that for me.

Well the next step is to put up the three other sections. One more on the passenger side and two on the driver side. Hopefully I will have good weather and will get it done quickly.

Until next time.