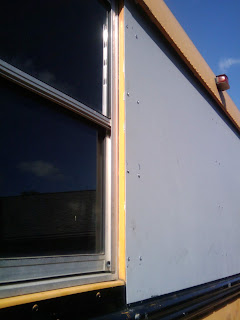
Hay all, Got a lot done this week. I am for the most part done with hanging the panels on the exterior of the bus, just a few odds and ends to finishing up until I start building out the inside.
OK here is the drives side with the emergency exit door. Got it done Tuesday with the help of my Brother. The very first panel I hung on the other side was a pain in the butt. If I had known what I had learned from putting up the last three, when I did the first one it would have been so much easier.
I put construction adhesive on the bus then clamped the panels in place as well as use long 2x4's pushing up from the bottom edges in two places. I then drilled one place on each end to secure it to the bus, then drilled out, starting in the center of the panel and working out, and attached it with rivets. Boy did my had hurt.
Drivers side front edge. I took the covers off between the windows on the other side, but not on the driver side. If I were to do it again, I would leave the covers on like I did on the drivers side. You will see why when you see the front passenger side edge.
Back edge of the front panel on the driver side. Looks nice. I measured top to bottom at 31 inches. If I ever do this again I'll go 30 1/2 inches to better clear the lower row of screws.
Front edge of driver side second or rear panel just after the emergency exit door. Have a little clean up to do on the construction adhesive.
Rear edge of the second panel on the driver side. I took the two emergency exit windows that were taken out and put them across from each other in the master bed room area. My thought is to be able to have them open on nice cool nights and get a good cross breeze.
Rear edge passenger side. I did not like the way this was left. I will be putting a lot of silicone caulk in there. This is why I said earlier I would leave the panels between the windows on.
This is the seem when the front passenger side panel goes over the rear passenger side panel. I like the way it fit. They overlap by about 4 inches and have two rows of rivets to hold them together.
Front passenger side panel edge. I had one of the window panels cut to cover the front edge to help keep water and wind from entering under the panel. How ever I still like the look of the front panel on the other side.
Bad pic because of the sun and phone camera, but this is a long pic of the passenger side.
A look at the inside.
My helper. Thanks Ronnie for helping out.
My next step is to secure the inside tops. I am using the aluminum tray rack that you see in the interior pic to make some angle brackets to attached to the top window frame and sheet metal. After that I will be sealing up the edges with silicone and then putting in sheet insulation where the windows use to be. Then I'll start working on framing up the insides.
Until next time...


No comments:
Post a Comment